Interesting Valve Clearance Technique

Tornado

FULL MEMBER
Joined
Dec 2017
Messages
5,405
Country flag
Had this viddy on my feed today...looks intriguing...

Basically the TPI of the adjusters is determined, then all clearance zero'd out with cam just about to open the valve...winding out adjuster by the needed amount previously determined, ie a partial turn. Set the lock nut and done. No feelers needed and it takes into account and valve tip indentations.
 
On a Norton is very hard to set up dial indicators , especially on the valve adjuster, if the engine is in the frame. The Commando Rider's Manual show you the proper way to do it. The tops of adjusters are normally not true and flat. On a 650 Triumph I would use the unscrew method and by feel, like the old time Triumph mechanics showed me.
 
Last edited:
Done it like that for years.

Basically it is easier and quicker.

It’s also more accurate as it takes into account any pocketing in the top of the valve etc.
 
Never seen this before but I love it!

Setting the valve clearance is a job I hate doing, it takes much longer than it should, mainly due to the wear on the valve top. With a feeler gauge, you can set it so the gauge is a snug fit, but should it be more snug?, you get a different reading with the tip of the gauge than you get when you push the whole gauge in there, so it becomes a judgement, rather than an absolute measure.
 
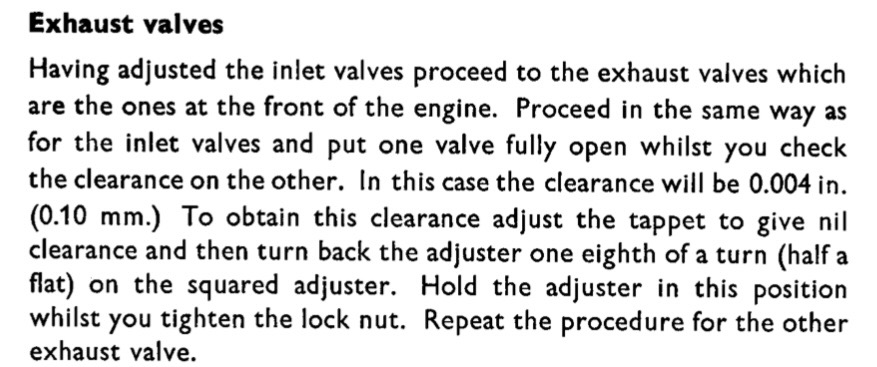
Pretty sure 1/8 turn exhaust clearance is in the 1955 Triumph manual.
In fact it’s in the 1970 handbook too.


Interesting Valve Clearance Technique


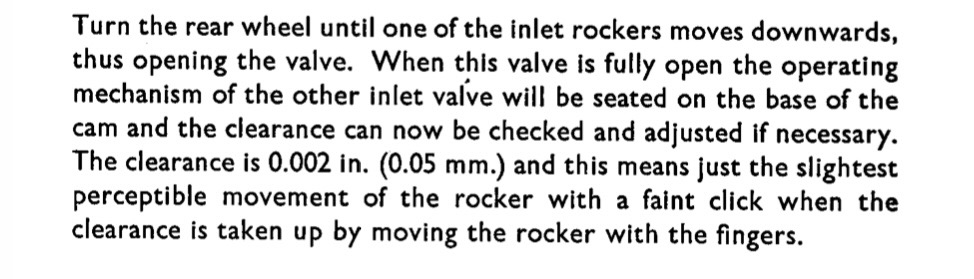
For the inlets, a faint click!
Interesting Valve Clearance Technique
 
On a Norton is very hard to set up dial indicators , especially on the valve adjuster, if the engine is in the frame. The Commando Rider's Manual show you the proper way to do it. The tops of adjusters are normally not true and flat. On a 650 Triumph I would use the unscrew method and by feel, like the old time Triumph mechanics showed me.
But if you had a spare adjuster & nut in the parts bin, you'd only need to determine the TPI on the bench with a dial indicator or other method. Could even flat off the adjust top if worried about it. Once known, toss the dial indicator back in the bin and proceed as per video on the bike.
 
But if you had a spare adjuster & nut in the parts bin, you'd only need to determine the TPI on the bench with a dial indicator or other method. Could even flat off the adjust top if worried about it. Once known, toss the dial indicator back in the bin and proceed as per video on the bike.
All my bikes that I have been checking valves on are recent rebuilds, so the parts are not dished, I want accurate sizing , so I know things are not changing and the work is doing what I expect. The WEB Cam I am using even uses less clearance/Lash than the normal 6 and 8 , so I really needed to be extra fussy on this one. IT's nice to see how recent rebuild are responding to their break in.
 
Done it like that for years.

Basically it is easier and quicker.

It’s also more accurate as it takes into account any pocketing in the top of the valve etc.
So, Nigel, how to you achieve the correct angle when loosening from "snug"?
At 26 TPI, 6 & 8 thou are 56 and 75 degrees respectively - unless i'm missing something.
Cheers
 
So, Nigel, how to you achieve the correct angle when loosening from "snug"?
At 26 TPI, 6 & 8 thou are 56 and 75 degrees respectively - unless i'm missing something.
Cheers

I suppose I forgot mine ain’t stock so I’m not using stock settings. Not difficult to get quite accurate with practice for my settings, but I’m using the same for in and ex.

But then again, I seldom use a torque wrench either. Prob best to ignore !
 
Back
Top